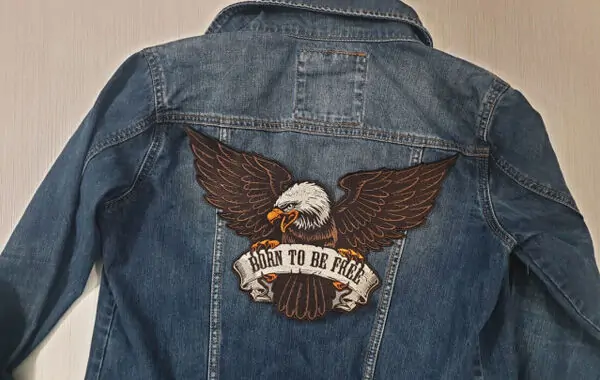
1. Materials Needed:
•Patch(es)
•Jacket
•Needle
•Thread (matching the border of the patch)
•Scissors
•Pins or fabric glue (optional)
•Thimble (optional)
•Sewing machine (optional)
40% OFF
· LIMITED TIME ONLY
5%
off any re-order
June 7 2024
Sewing patches onto a jacket can be a fun and creative way to personalize your clothing. Here’s a step-by-step guide to help you sew patches onto a jacket:
•Patch(es)
•Jacket
•Needle
•Thread (matching the border of the patch)
•Scissors
•Pins or fabric glue (optional)
•Thimble (optional)
•Sewing machine (optional)
1. Choose Patch Placement:
•Decide where you want to place your patch on the jacket. Popular spots include the sleeves, chest, and back.
2. Prepare the Jacket:
•Lay the jacket on a flat surface and smooth out any wrinkles.
•If the fabric is delicate, consider using an embroidery hoop to keep it taut and prevent puckering.
3. Secure the Patch:
•Position the patch where you want it.
•Use pins to hold it in place or apply a small amount of fabric glue to the back of the patch to temporarily stick it to the jacket.
4. Thread the Needle:
•Cut a length of thread about 18 inches long.
•Thread the needle and tie a knot at the end of the thread.
5. Start Sewing:
•Insert the needle from the inside of the jacket to hide the knot on the backside.
•Use a straight stitch, blanket stitch, or whip stitch to sew around the edge of the patch.
Types of Stitches: (Straight Stitch)
•Simple and effective, go in and out of the fabric close to the edge of the patch.
•Blanket Stitch:
•Decorative and secure, loop the thread over the edge of the patch and into the fabric.
•Whip Stitch:
•Easy and quick, stitch around the edge of the patch from one side to the other.
6. Sew Around the Patch:
•Continue stitching around the entire edge of the patch. Make sure the stitches are even and close enough to securely attach the patch.
•For thicker patches, you might need to use a thimble to push the needle through.
7. Finish the Stitching:
•When you reach the starting point, tie a knot on the inside of the jacket to secure the thread.
•Cut off any excess thread.
8. Final Touches:
•Check to ensure the patch is securely attached and there are no loose threads.
•Remove any pins if you used them.
1. Prepare the Sewing Machine:
•Set up the machine with a matching thread.
•Select a straight stitch or zigzag stitch.
2. Sew the Patch:
•Carefully sew around the edges of the patch, ensuring you guide the fabric smoothly to avoid bunching.
3. Finish Up:
•Backstitch at the end to secure the thread.
•Trim any loose threads.
•If the patch has adhesive backing, follow the manufacturer’s instructions for ironing it on before sewing.
•Choose a thread color that matches the edge of the patch for a seamless look.
•Take your time, especially when hand-sewing, to ensure neat and durable stitches.
•With these steps, you should be able to successfully sew patches onto your jacket, giving it a unique and personalized look.
Nice customize is a manufacturer of custom patches online.It make creators can produce unique custom patches for all various of clothes.These patches just requires fewer MOQ(minimum order quantity) and lower price. No matter what you are stand for company,cafe, motorcycle club,fire department,clothing brand or military unit; we will provide you with professional customized patches, now contact us or create your product onlione.
Share:


Upload Your Artwork
Allowed extensions *.png *.jpg *.jpeg *.ai *.eps *.psd *.tif *.tiff *.pdf*.bmp

Thanks for your message.
I am Lisa, thank you for your interest in our products! This is the message number! [ ID M6015 ] We'll be in touch with you soon regarding the next steps. Usually we will reply you within hours. Please make sure to check your email for our reply. Our email address is "sales@nicecustomize.com" Thank you.
