UP TO  

40% OFF

 · LIMITED TIME ONLY

5%

  off any re-order
Searching For The Perfect Patch Size!

June 14 2024

How To Make Your Own Fire Patch:A Step-by-Step Guide

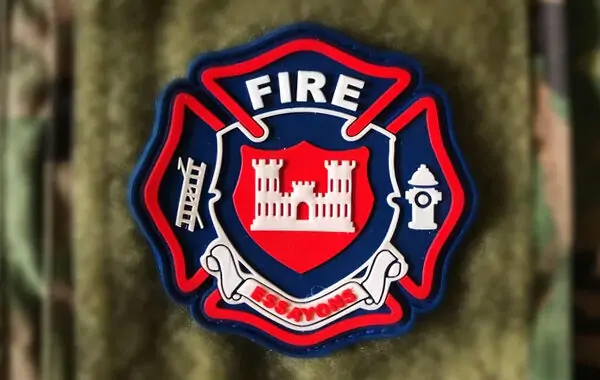
Creating your own fire patch, typically used in scouting or emergency services, involves a combination of design, materials selection, and some basic sewing or embroidery skills.

Step 1: Design Your Patch

1. Conceptualize Your Design: Decide on the theme, symbols, text, and colors. Fire patches often feature flames, fire equipment, and sometimes a motto or group name. 2. Use Design Software: Programs like Adobe Illustrator, CorelDRAW, or even free options like Inkscape can be used to create a detailed design. Ensure your design is clear and not overly complicated for ease of stitching. 3. Color Choices: Pick colors that stand out and are true to the fire theme (reds, oranges, yellows, and maybe some blues and blacks for contrast).

Step 2: Choose Materials

1. Base Fabric: Choose a durable fabric such as twill or felt. Twill is popular for its durability and smooth finish.
2. Threads: Use high-quality embroidery threads. Polyester or rayon threads are strong and come in various colors.
3. Backing: Depending on how the patch will be used, choose between sew-on, iron-on, or Velcro backing.

Step 3: Transfer Design to Fabric

1. Print the Design: Print your design to the actual size you want the patch to be.
2. Transfer: Use a lightbox or transfer paper to trace the design onto the fabric. Alternatively, some printers can print directly onto fabric sheets if they are compatible.

Step 4: Embroidery

1. Set Up Your Embroidery Machine: If you have an embroidery machine, set it up with the correct thread colors and load the design into the machine.
2. Hand Embroidery: If you’re doing it by hand, use an embroidery hoop to keep the fabric taut. Follow the design, starting with the outline and then filling in the details.
3. Stitch Types: Use a variety of stitches (e.g., satin stitch for solid areas, backstitch for outlines) to create texture and depth.

Step 5: Finishing Touches

1. Cut Out the Patch: Carefully cut out the patch, leaving a small border around the edge.
2. Edge Finishing: Use a zigzag stitch or serger around the edge to prevent fraying. For a more professional look, you can also use a border stitch.
3. Attach Backing: If you’re using an iron-on backing, follow the manufacturer's instructions to apply it. For Velcro, sew the hook side to the patch and the loop side to the garment.

Step 6: Final Inspection

•Quality Check: Ensure all stitches are secure and the design is as intended.
•Trim Excess Threads: Carefully trim any loose threads for a clean finish.

Optional: Outsourcing Production

If making the patch by hand is too challenging or time-consuming, consider outsourcing production to a professional patch maker. Many companies offer custom embroidery services and can produce high-quality patches based on your design.

Creating your own fire patch can be a rewarding project that results in a unique and personal item. Whether you choose to hand-make it or have it professionally produced, the key is in the design and quality of materials used.

Nice customize is a manufacturer of custom patches online.It make creators can produce unique custom patches for all various of clothes.These patches just requires fewer MOQ(minimum order quantity) and lower price. No matter what you are stand for company,cafe, motorcycle club,fire department,clothing brand or military unit; we will provide you with professional customized patches, now contact us or create your product onlione.

Share:

Privacy Policy Terms & Conditions Copyright 2023 nicepatches. All Rights Reserved.
May we use cookies to track your activities? We take your privacy very seriously. Please see our privacy policy for details and any questions. Yes No

Subscribe to our newsletter

Sign up to save big on all your custom projects
Promotions,customizing new products,tracking
order alerts,and more, delivered to your inbox

Enjoy 40% off your entire order,no code needed
5% off any re-order

Nice Customize Live ChatX
Sorry,we aren't online at the moment
Leave a message with your email address and your request and we'll get back to you.

Message

Upload Your Artwork

Allowed extensions *.png *.jpg *.jpeg *.ai *.eps *.psd *.tif *.tiff *.pdf*.bmp

Message

Thanks for your message.

I am Lisa, thank you for your interest in our products! This is the message number! [ ID M6015 ] We'll be in touch with you soon regarding the next steps. Usually we will reply you within hours. Please make sure to check your email for our reply. Our email address is "sales@nicecustomize.com" Thank you.