

1. Materials Needed:
Iron-on patch
Shirt
Iron
Ironing board
Thin cloth or towel
Optional: Parchment paper or pressing cloth
40% OFF
· LIMITED TIME ONLY
5%
off any re-order

June 5 2024
Ironing a patch onto a shirt is a straightforward process. Here are the steps to ensure it adheres properly and stays in place: A Step-By-Step Guide
Iron-on patch
Shirt
Iron
Ironing board
Thin cloth or towel
Optional: Parchment paper or pressing cloth
1. Prepare the Shirt and Patch:
• Wash and dry the shirt to remove any dirt or oils that could prevent the patch from adhering properly.
•Lay the shirt flat on the ironing board.
2. Position the Patch:
•Decide where you want to place the patch on the shirt.
•Position the patch with the adhesive side down on the desired area.
3. Protect the Patch:
•Place a thin cloth or towel over the patch to protect it from direct heat. Alternatively, you can use a piece of parchment paper or a pressing cloth.
4. Heat the Iron:
•Set the iron to the temperature recommended on the patch's packaging. If no specific instructions are given, a medium to high heat setting (usually the "cotton" setting) works well.
•Ensure the steam function is turned off.
5. Iron the Patch:
•Press the iron down firmly on the cloth-covered patch.
•Apply steady pressure for about 15-20 seconds. Avoid moving the iron back and forth as this can cause the patch to shift.
6. Check the Adhesion:
•Lift the iron and cloth to check if the patch has adhered. If the edges are not fully stuck, cover the patch again and apply heat for an additional 10-15 seconds.
•For larger patches, you may need to repeat this process over different sections to ensure the entire patch is secure.
7. Let It Cool:
•Allow the patch and shirt to cool completely before handling. This helps the adhesive set properly.
8. Test the Edges:
•Once cool, gently tug at the edges of the patch to ensure it is securely attached. If any edges are loose, repeat the ironing process on those areas.
1. For delicate fabrics, place a pressing cloth or thin towel between the shirt and the iron to prevent scorching.
2. Follow specific instructions: If the patch comes with specific ironing instructions, always follow them for the best results.
3. Avoid washing the shirt immediately: After applying the patch, wait at least 24 hours before washing the shirt to give the adhesive time to fully bond.
By following these steps, you should be able to securely iron a patch onto your shirt.
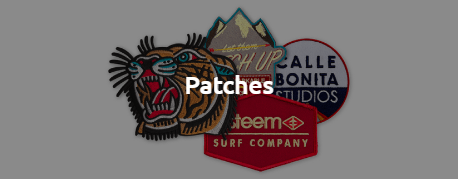
Nice customize is a manufacturer of custom patches online.It make creators can produce unique custom patches for all various of clothes.These patches just requires fewer MOQ(minimum order quantity) and lower price. No matter what you are stand for company,cafe, motorcycle club,fire department,clothing brand or military unit; we will provide you with professional customized patches, now contact us or create your product onlione.
Share:


 www.nice customize.com
 Call: 186 8863 4274
 Email: sales@nicecustomize.com
 Chat with an expert
Subscribe to our newsletter
Sign up to save big on all your custom projects
Promotions,customizing new products,tracking
order alerts,and more, delivered to your inbox
Enjoy 40% off your entire order,no code needed
5% off any re-order


Upload Your Artwork
Allowed extensions *.png *.jpg *.jpeg *.ai *.eps *.psd *.tif *.tiff *.pdf*.bmp

Thanks for your message.
I am Lisa, thank you for your interest in our products! This is the message number! [ ID M6015 ] We'll be in touch with you soon regarding the next steps. Usually we will reply you within hours. Please make sure to check your email for our reply. Our email address is "sales@nicecustomize.com" Thank you.